Thursday, 11 February 2016

SSL Configuration in OBIEE

Steps to Convert a PFX Certificate into a JKS Certificate to configure it on OBIEE

Step 1:

Set up the environment for the domain, by executing the setDomainEnv.cmd script, typically located atC:\MW_HOME\user_projects\domains\bifoundation_domain\binsetDomainEnv.cmd 

Step 2:

Use OpenSSL to check the pfx certificate's content.[Note: OpenSSL is open source software to implement basic cryptographic functions and provides various utility functions]


Download openssl and set the path for openssl.exe openssl pkcs12 -in <certificate.pfx> -out KEYSTORE.pem –nodes Eg: openssl pkcs12 -in Companyname.pfx -out KEYSTORE.pem -nodes


At this point, a password for the pfx file will be requested. 


Expected output:openssl pkcs12 -in <certificate.pfx> -out KEYSTORE.pem -nodes Enter Import Password: MAC verified OK


Step 3:

Open KEYSTORE.pem file, from step 2. This should look similar to this: You will find three certificates on it and the private key:


Bag Attributes Microsoft Local Key set: <No Values> localKeyID: 01 00 00 00 friendlyName: le-36c42c6e-ec49-413c-891e-591f7e3dd306 Microsoft CSP Name: Microsoft RSA SChannel Cryptographic Provider Key Attributes X509v3 Key Usage: 10 -----BEGIN RSA PRIVATE KEY----- MIIEpQIBAAKCAQEAtPwoO3eOwSyOapzZgcDnQOH27cOaaejHtNh921Pd+U4N+dlm . . . EDITING . . . R5rsB00Yk1/2W9UqD9Nn7cDuMdilS8g9CUqnnSlDkSG0AX67auKUAcI= -----END RSA PRIVATE KEY----- Bag Attributes localKeyID: 01 00 00 00 friendlyName: *.something.com subject=/serialNumber=sj6QjpTjKcpQGZ9QqWO-pFvsakS1t8MV/C=US/ST=Missouri/L=CHESTERFIELD/O=Oracle_Corp, Inc./OU=Oracle/CN=*.something.com issuer=/C=US/O=GeoTrust, Inc./CN=GeoTrust SSL CA -----BEGIN CERTIFICATE----- MIIErzCCA5egAwIBAgIDAIH6MA0GCSqGSIb3DQEBBQUAMEAxCzAJBgNVBAYTAlVT . . . EDITING . . . wA5JxaU55teoWkuiAaYRQpuLepJfzw+qMk5i5FpMRbVMMfkcBusGtdW5OrAoYDL9 4rgR -----END CERTIFICATE----- Bag Attributes friendlyName: GeoTrust Global CA subject=/C=US/O=GeoTrust Inc. /CN=GeoTrust Global CA issuer=/C=US/O=GeoTrust Inc. /CN=GeoTrust Global CA -----BEGIN CERTIFICATE----- MIIDVDCCAjygAwIBAgIDAjRWMA0GCSqGSIb3DQEBBQUAMEIxCzAJBgNVBAYTAlVT . . . EDITING . . . 5fEWCRE11azbJHFwLJhWC9kXtNHjUStedejV0NxPNO3CBWaAocvmMw== -----END CERTIFICATE----- Bag Attributes: <Empty Attributes> subject=/C=US/O=GeoTrust, Inc. /CN=GeoTrust SSL CA issuer=/C=US/O=GeoTrust Inc. /CN=GeoTrust Global CA -----BEGIN CERTIFICATE----- MIID2TCCAsGgAwIBAgIDAjbQMA0GCSqGSIb3DQEBBQUAMEIxCzAJBgNVBAYTAlVT . . . EDITING . . . TpnKXKBuervdo5AaRTPvvz7SBMS24CqFZUE+ENQ= -----END CERTIFICATE-----


Step4:


Identify and store contents from KEYSTORE.pem certificate, to proceed and create jks files: At this point, you will find  three certificates on  KEYSTORE.pem and the private key. 4.1 Private Key.


To identify the private key, look for the following headings:-----BEGIN RSA PRIVATE KEY----- -----END RSA PRIVATE KEY----- Both above mentioned tags will be surrounded the private key. Go ahead and save the content of it into a file called: my_key_pk.pem. This has to include the headings.  Expected file:-----BEGIN RSA PRIVATE KEY----- MIIEpQIBAAKCAQEAtPwoO3eOwSyOapzZgcDnQOH27cOaaejHtNh921Pd+U4N+dlm . . . EDIT . . . Y4ZrW12PRa9/EOBGTG5teKAEada/K4yKReTyQQAGq6j5RjErmuuKkKgPGMSCjvMS R5rsB00Yk1/2W9UqD9Nn7cDuMdilS8g9CUqnnSlDkSG0AX67auKUAcI= -----END RSA PRIVATE KEY-----


4.2 Root Certificate.


To identify the Root Certificate, look for the following headings:subject=/C=US/O=GeoTrust Inc./CN=GeoTrust Global CA issuer=/C=US/O=GeoTrust Inc./CN=GeoTrust Global CA


Subject and issuer must be the same. Go ahead and save the content of it into a file called: my_key_root.pem. Include all the content from BEGIN CERTIFICATE TO END CERTIFICATE, both included.


4.3 Intermediate Certificate.


To identify an Intermediate Certificate, look for the following heading:subject=/C=US/O=GeoTrust, Inc./CN=GeoTrust SSL CA issuer=/C=US/O=GeoTrust Inc./CN=GeoTrust Global CA


Subject and issuer are different only on the CN. Go ahead and save the content of it into a file 

called:my_key_intermediate.pem. Include all the content from BEGIN CERTIFICATE TO END CERTIFICATE, both included.

NOTE: This certificate is optional and there are some cases where it'll not be present. If this is the case, go ahead and skip this step. In any other case, this needs to be added to the identity keystore jks file. 


4.4 Server Certificate.


 To identify a Server Certificate, look for the following heading:


friendlyName: some.thing.com

subject=/serialNumber=sj6QjpTjKcpQGZ9QqWO-pFvsakS1t8MV/C=US/ST=Missouri/L=CHESTERFIELD/O=Oracle_Corp, Inc./OU=Oracle/CN=some.thing.com


        A server certificate includes a heading called Friendly Name. Go ahead and save the content of it into a file called: my_key_crt.pem. Include all the content from BEGIN CERTIFICATE TO END CERTIFICATE, both included. 

Step 5:

Create a Trust Keystore and import the Root certificate into it.Run this commands from the file that contain your certificates

keytool -import -trustcacerts -file my_key_root.pem -alias my_key_root -keystore my_key_trust.jks -storepass <store_pass> -keypass <key_pass> 


Expected Output:


Certificate already exists in system-wide CA keystore under alias <geotrustglobalca> Do you still want to add it to your own keystore? [no]: yes Certificate was added to keystore Step 6: Generate an Identity Keystore and import Server into it. Java utils.ImportPrivateKey -keystore my_key_identity.jks -storepass <store_pass> -storetype JKS -keypass <key_pass> -alias server_identity -certfile my_key_crt.pem -keyfile my_key_pk.pem -keyfilepass <pfx_password>
 
With these instructions, two jks files will be produced:


·         my_key_identity.jks
·         my_key_trust.jks


With both files, the next step is to configure Custom Identity and Custom Trust on Weblogic


Steps to configure Custom Identity and Custom Trust with Weblogic


Step 1: Login to Weblogic Admin console 


Step 2: Click on Lock & Edit


Step 3
Environment --> Servers --> < server_name_where_ssl_has_to_be_configured >


Step 4: Select Admin Server

Step 5:
·         Configuration -> General --> SSL Listen Port Enabled ( Check )
·         Note: The SSL Listen Port to 7002(make sure the port is available), change it if required. 

Step 6:
·         Click on Keystores tab under " Configuration " tab :
·         Click on the drop down menu next to Keystores and select " Custom Identity and Custom Trust " 
·         Click on Save


Step 7:
Now fill the following information:
---Identity---  
Custom Identity Keystore: < location_of_identity_keystore_that_you_have_created>
NOTE: By default WLS will look for this keystore file in domain_home location.
 Custom Identity Keystore Type: jks
 Custom Identity Keystore Passphrase: < This_would_be_your_storepass >
 ---Trust---
 Custom Trust Keystore: < location_of_trust_keystore_that_you_have_created>
 NOTE: By default WLS will look for this keystore file in domain_home location.
 Custom Trust Keystore Type: jks
 Custom Trust Keystore Passphrase: < This_would_be_your_storepass >


Step 8:
Now save the changes and click on “SSL” tab:
·         Private Key Alias: < This_would_be_your_certificate_alias>
·         Private Key Passphrase: < This_would_be_your_keypass >


Step 9:
·         Save the changes and click on the " >Advanced " field under the “SSL” tab:  
·         Set the " Hostname Verification: " to none (from the drop down menu).


Step 10: 

Repeat the same steps for bi_server1 set the ssl listen port as 9804(make sure the port is available)

Step 11: Click on Activate changes


Step 12: 

Configure node manager for SSL
1. Stop the Node manager service
2. Update the nodemanager.properties file at the location MW_HOME/wlserver_10.3/common/nodemanager by updating the following properties:
ListenAddress=<fully_qualified_server_name>, 
SecureListener=true
CipherSuite=SSL_RSA_EXPORT_WITH_RC4_40_MD5
DomainRegistrationEnabled=true

3. Add the following properties to this file:
KeyStores=CustomIdentityAndCustomTrust
CustomIdentityKeyStoreType=JKS
CustomIdentityKeyStoreFileName =<Identity keystore location>
CustomIdentityAlias= <Alias of identity keystore>
CustomIdentityPrivateKeyPassPhrase=<Identity Private Key pass phrase>
CustomTrustKeyStoreFileName ==<Trust keystore location>
CustomIdentityKeyStorePassPhrase=<Key Store Passphrase>


Step 13: Save the file and restart all services

Step 14:
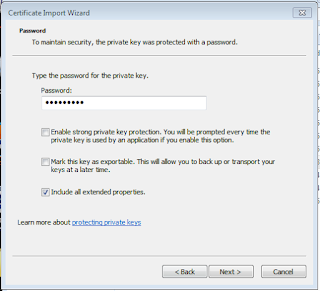
Install .pfx certificate on your server
·         Double click on the certificate
·         Click on next


Specify the file you want to import


·         Type your pfx Password


Select certificate store as Trusted Root Certification Authorities


·         Click Flinish


·         You will see the message as The import was successful


Step 15:
·         Now log into your OBIEE using the new address

·         https://Domain name in certificate:9804/analytics
·         https://Domain name in certificate:7002/console


Friday, 5 February 2016

SCD TYPE 1 AND TYPE 2 IMPLEMENTATION IN ODI 11g


Slowly changing Dimensions are dimensions that change slowly over time rather than on a regular basis, for example salary of an individual, job location etc.


There are mainly 3 types of SCD:

·         SCD Type 1: The new record replaces the existing record. No trace of the old record exists.
·         SCD Type 2: Creating a new additional record (row). History is tracked.
·         SCD Type 3: Adding a new column

Let us see how we will implement SCD Type 1 and Type 2 in ODI.

Requirement: To apply SCD Type 2 in Employees OLAP table for capturing the history of salary.

SCD TYPE 1:
In SCD Type 1 we are not keeping the history, we are just replacing the data with new one.
We can use IKM Oracle Incremental update from the IKM Selector and there are no additional modifications required in the mapping.
We can look into SCD Type 2 and see the differences between SCD Type 1 and Type 2 in the mapping.

SCD TYPE 2:
To implement SCD TYPE 2 we can use Employees table from HR Schema.

Source Schema
HR
Source Tables
“EMPLOYEES”
Target Table
“EMPLOYEES_SCD”
Scenario
To apply SCD Type 2 in “EMPLOYEES” table for capturing the history of salary.


 o   Create a target table for SCD Type 2


ROW_ID: Surrogate key for the table. 

EMPLOYEE_ID: Natural Key.

START_DATE: Starting time stamp (When the record is inserted into the data base).

END_DATE: Ending time stamp (We can give a future date to this column).

FLAG: Current record flag.

o        Create a database sequence in your target schema; this will be used as surrogate key in target table.
Now reverse engineer from your source and target models to populate the table in corresponding models.


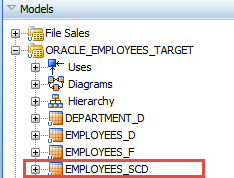
o   After the reverse engineering you can see your target table in your model


o   Now we have to define some properties for the table and columns
o   Double click on EMPLOYEES_SCD Table and from the definition tab select OLAP type as slowly changing dimension.


o 


Now expand EMPLOYEES_SCD Table and give SCD behavior for each column.


o   ROW_ID is Surrogate key


 o   EMPLOYEE_ID is Natural key


 o   FIRST_NAME: We can give SCD behavior of this column to overwrite on change, so that the          record will be overwritten when the value is changed.


  •     EMAIL: Give overwrite on change.

  • SALARY: The salary of an employee is an slowly changing attribute, keeping history make     sense so we can give Add row on change to this attribute so that when there is a change in the value a new column will be added and previous records is stored. 
  • START_DATE: This column is Starting Timestamp, when the record is inserted into the data base.

o   END_DATE: This column is Ending Time stamp; we assign a  far future date for time being.


 FLAG: This column indicates status of the record select Current Record Flag for this column.
§    1: Present record.
§    0: Old record.


Now we are ready with the SCD Target table and now we can move to the interface.


o     Creating interface for SCD Type2 implementation.
o   From your project folder right click on interface and select new interface.


o   Give a name for your interface in definition tab.


o  In the Mapping tab drag your source and target to your interface and it will ask for auto mapping click ok for that.


o 


  For ROW_ID we have to create a sequence that will execute your data base sequence you created in your database.
o   From Sequence select New Sequence.


o   Give a name for your sequence.
o   Then select Native sequence and select the sequence that you created in your data base.
o   In this example we created SEQ_ROW_ID in our EMPLOYEE_TARGET schema and selected this sequence here.


o   Now select the ROW_ID column in your target and select edit icon from mapping properties.


o   Now double click on your data base sequence


o   ROW_ID: Values from the data base sequence is added to this column.
o   START_DATE: Mark SYSDATE for this column
o   END_DATE: We can give a future date to this column(to_date(’01-01-2400’,’mm-dd-yyyy’))
o   FLAG: Default value will be 1.
o   Change the execution of EMPLOYEE_ID, FIRST_NAME, LAST_NAME, EMAIL and SALARY to staging area from source.
o   Execution of ROW_ID, START_DATE, END_DATE and FLAG to Target.


o  In the quick edit tab check the unique key column for ROW_ID, this will be our primary key


o   In the IKM Selector you have to select IKM Oracle Slowly Changing Dimension, for that you need to have this IKM in your project.

Then give flow control and static control to true.


v  If you are working with SCD TYPE 1 you have to select IKM as Oracle Incremental Update and there is no need to set SCD behaviour for the target table you just need source and target and load data directly by selecting Incremantal Upate IKM. Don’t forget to set primary key constraint in target table and set flow control and static control to true.

o   From the control tab select CKM SQL


o   Now save your interface and execute it.


o   After that check your execution and you can see your mapping executed successfully.   


o   Now we can check our target table EMPLOYEES_SCD.


o   In the screenshot you can see that END_DATE is a future date and flag is 1 for current records.

o   Now we can update some columns in source and check how it will be reflected in our target.


o   In this example I am updating SALARY of a user and EMAIL of another user
o   Commit this after updating the records.


o   Now execute your interface from ODI.

o   Now check the updated records from your target DB


  •  In the target table you can see a new record is inserted for record having EMPLOYEE_ID=102  with the updated salary. This is since the source record was updated with the new salary and as the salary column has SCD behavior of add row on change.


          For the latest record current flag is set to 1 and the old record the current flag is changed to 0               and END_DATE of the old record is changed to the date at which the new record is inserted.

  •    For EMPLOYEE_ID = 103 we updated EMAIL ID of that user. EMAIL has SCD behavior of  Overwrite on Change so previous EMAIL ID is replaced with new EMAIL.


Friday, 29 January 2016

[OBIEE 11g] Weblogic SSL Error ERR_SSL_VERSION_OR_CIPHER_MISMATCH in Chrome [Solved]


Error:

While opening SSL enabled OBIEE url we got the following error as shown in the screen shot.


Description: SSL Error ERR_SSL_VERSION_OR_CIPHER_MISMATCH in Chrome

Cause:

Google chrome was updated to 48 and the latest version of chrome had dropped RC4 encryption support.

Solution:

Make a back up of the config file of OBIEE from the below mentioned location

$MW_HOME/user_projects/domains/bifoundation_domain/config
File: config.xml
Then edit the config file and add  line <ciphersuite>TLS_RSA_WITH_AES_128_CBC_SHA</ciphersuite>

after already existing cipher-suite

Then the file will look like.

Do the same for bi server also.


Then restart weblogic and you can log into the SSL enabled OBIEE easly.


Tuesday, 19 January 2016

ODI 11g Error:ORA-00920 in SCD Type 2 Solved.


ODI Error: ORA-00920 invalid relational operator.


Check the code corresponding to the interface and you can see an extra "and" condition after "where" clause.


Solution:

When implementing SCD Type 2 we define slowly changing dimension behavior for  each column in the table.

now i have given overwrite on change to all columns other than

  • Natural key
  • Surrogate key
  • Current record flag
  • Starting time stamp
  • Ending time stamp
If we are using IKM for slowly changing dimension we have to give Add Row on Change for  at least one column else if we are using Over Write on change for all column there is no meaning in using IKM for slowly changing dimension we can meet that with IKM for incremental update.


Monday, 11 January 2016

ODI 11g Error:ODI-1222 while running the interface Solved


Oracle Data Integrator 

Error ODI-1222 while running the interface.

Screen shot of the error is provided below.


Solution:

In the error it is explained that there is no connection for the logical schema.
So check your logical schema corresponding to the interface.


In this case logical schema  corresponding to the interface is EMPLOYEE_TARGET.

Expand the logical schema and check whether contexts are marked properly to the physical schema, else mark it accordingly.


 Then again execute your interface.


Then you can see your interface executed successfully.


Thank you.


Monday, 7 December 2015

Connecting to Oracle Database Using Service Name.

Connecting to Oracle Database Using Service Name.

While creating a connection to Database we give SID as Database Name.


To give Service name instead of SID.

  • Give a back slash before the Service name Eg: /Service name
If you are using JNDI connection give URL as shown below.

Service URL is:

jdbc:oracle:thin:@Host name:port/service name