Step 1: Login to Weblogic Admin console
Step 2: Click on Lock & Edit
Step 3:
Environment
--> Servers --> < server_name_where_ssl_has_to_be_configured >
Step 4: Select
Admin Server
Step 5:
·
Configuration -> General --> SSL Listen
Port Enabled ( Check )
·
Note: The SSL Listen Port to 7002(make sure
the port is available), change it if required.
Step 6:
·
Click on Keystores tab under "
Configuration " tab :
·
Click on the drop down menu next to Keystores
and select " Custom Identity and Custom Trust "
·
Click on Save
Step 7:
Now fill the
following information:
---Identity---
Custom
Identity Keystore: < location_of_identity_keystore_that_you_have_created>
NOTE: By
default WLS will look for this keystore file in domain_home location.
Custom
Identity Keystore Type: jks
Custom
Identity Keystore Passphrase: < This_would_be_your_storepass >
---Trust---
Custom
Trust Keystore: < location_of_trust_keystore_that_you_have_created>
NOTE: By default WLS will look for this
keystore file in domain_home location.
Custom
Trust Keystore Type: jks
Custom
Trust Keystore Passphrase: < This_would_be_your_storepass >
Step 8:
Now save the changes and click on “SSL” tab:
·
Private Key Alias: <
This_would_be_your_certificate_alias>
·
Private Key Passphrase: <
This_would_be_your_keypass >
Step 9:
·
Save the changes and click on the "
>Advanced " field under the “SSL” tab:
·
Set the " Hostname Verification: "
to none (from the drop down menu).
Step 10:
Repeat the
same steps for bi_server1 set the ssl listen port as 9804(make sure the port is
available)
Step 11: Click on
Activate changes
Step
12:
Configure
node manager for SSL
1. Stop the
Node manager service
2. Update
the nodemanager.properties file at the location MW_HOME/wlserver_10.3/common/nodemanager
by updating the following properties:
ListenAddress=<fully_qualified_server_name>,
SecureListener=true
CipherSuite=SSL_RSA_EXPORT_WITH_RC4_40_MD5
DomainRegistrationEnabled=true
3. Add the
following properties to this file:
KeyStores=CustomIdentityAndCustomTrust
CustomIdentityKeyStoreType=JKS
CustomIdentityKeyStoreFileName
=<Identity keystore location>
CustomIdentityAlias=
<Alias of identity keystore>
CustomIdentityPrivateKeyPassPhrase=<Identity
Private Key pass phrase>
CustomTrustKeyStoreFileName
==<Trust keystore location>
CustomIdentityKeyStorePassPhrase=<Key
Store Passphrase>
Step 13: Save the
file and restart all services
Step 14:
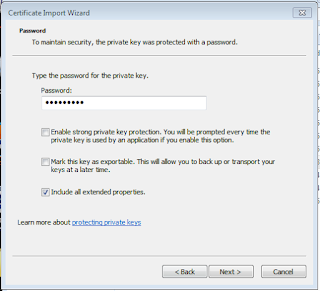
Install .pfx certificate on your server
·
Double click on the certificate
·
Click on next
Specify
the file you want to import
·
Type
your pfx Password
Select certificate store as Trusted Root Certification Authorities
·
Click Flinish


